Overview
| Layer | What it covers |
|---|---|
| 10 steps (this article) | What practitioners actually do week by week |
| 6 macro stages (GIF 1) | How teams talk about the lifecycle in planning meetings |
| 7 GIFs | One visual per critical transition — some steps share a GIF |
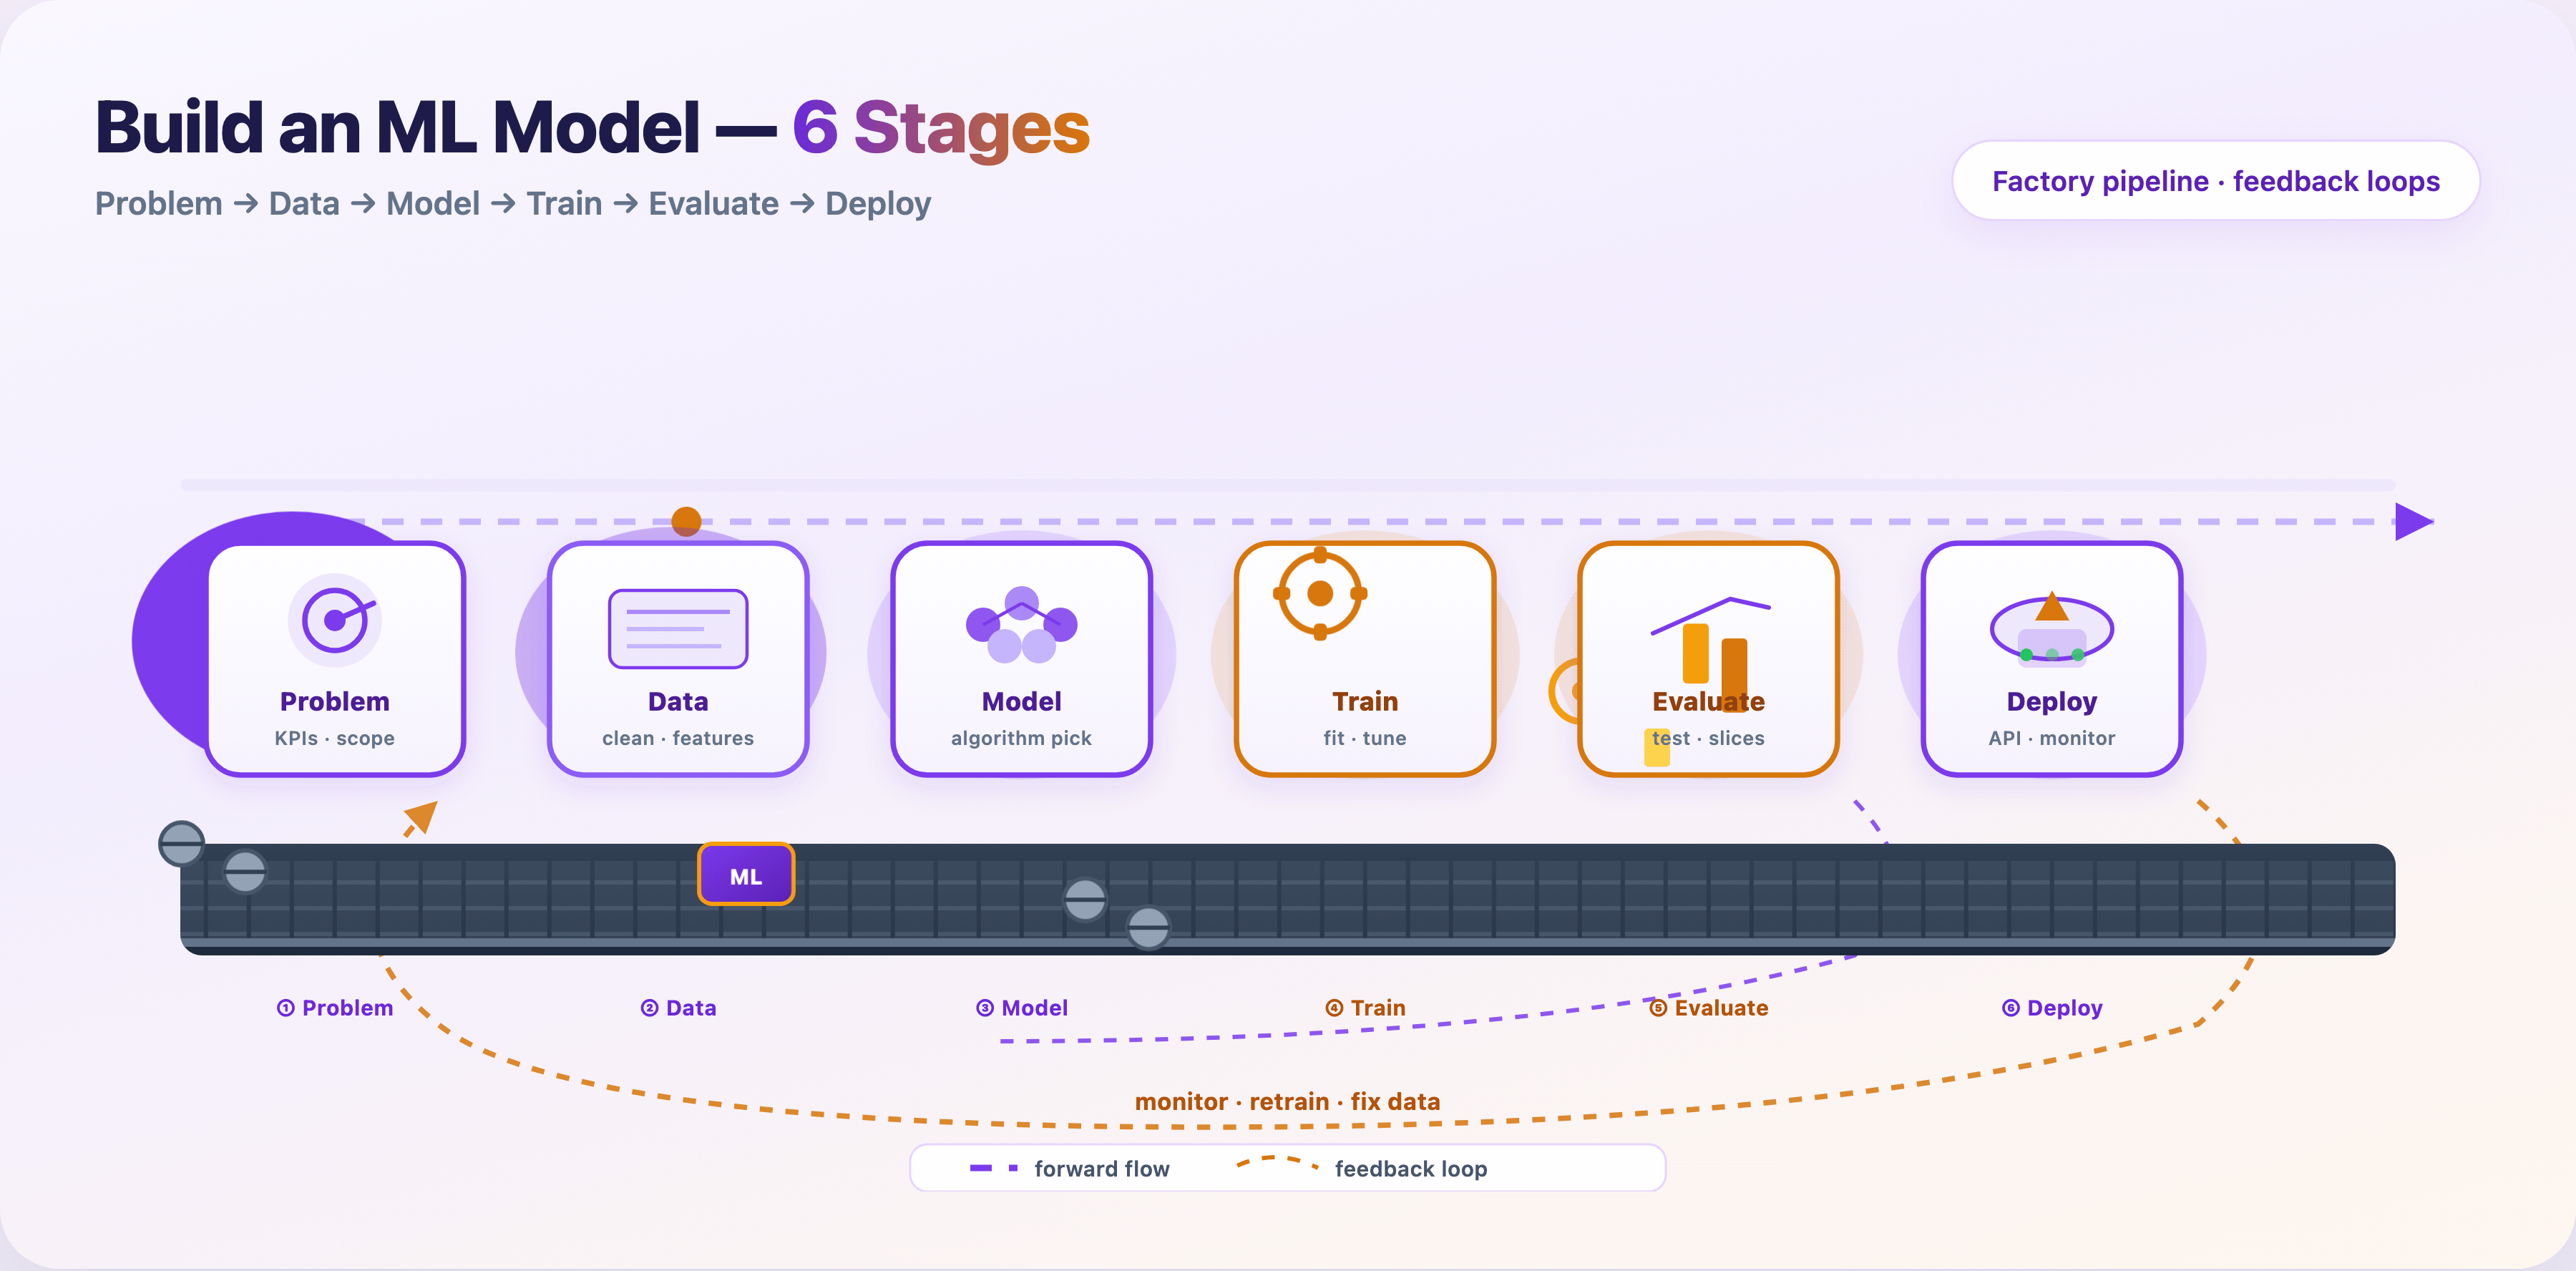
The six macro stages are: Problem → Data → Model → Train → Evaluate → Deploy. Steps 1–10 zoom in inside that frame.
0 — Deploy, monitor, and retrain
Package the model, ship an API, watch it in the wild.
Typical path:
- Serialize artifact (
v2.4.pkl, ONNX, SavedModel) - Containerize (Docker)
- Deploy behind
/predicton cloud or edge - Monitor latency, errors, input drift, prediction drift
- Retrain or rollback when alerts fire
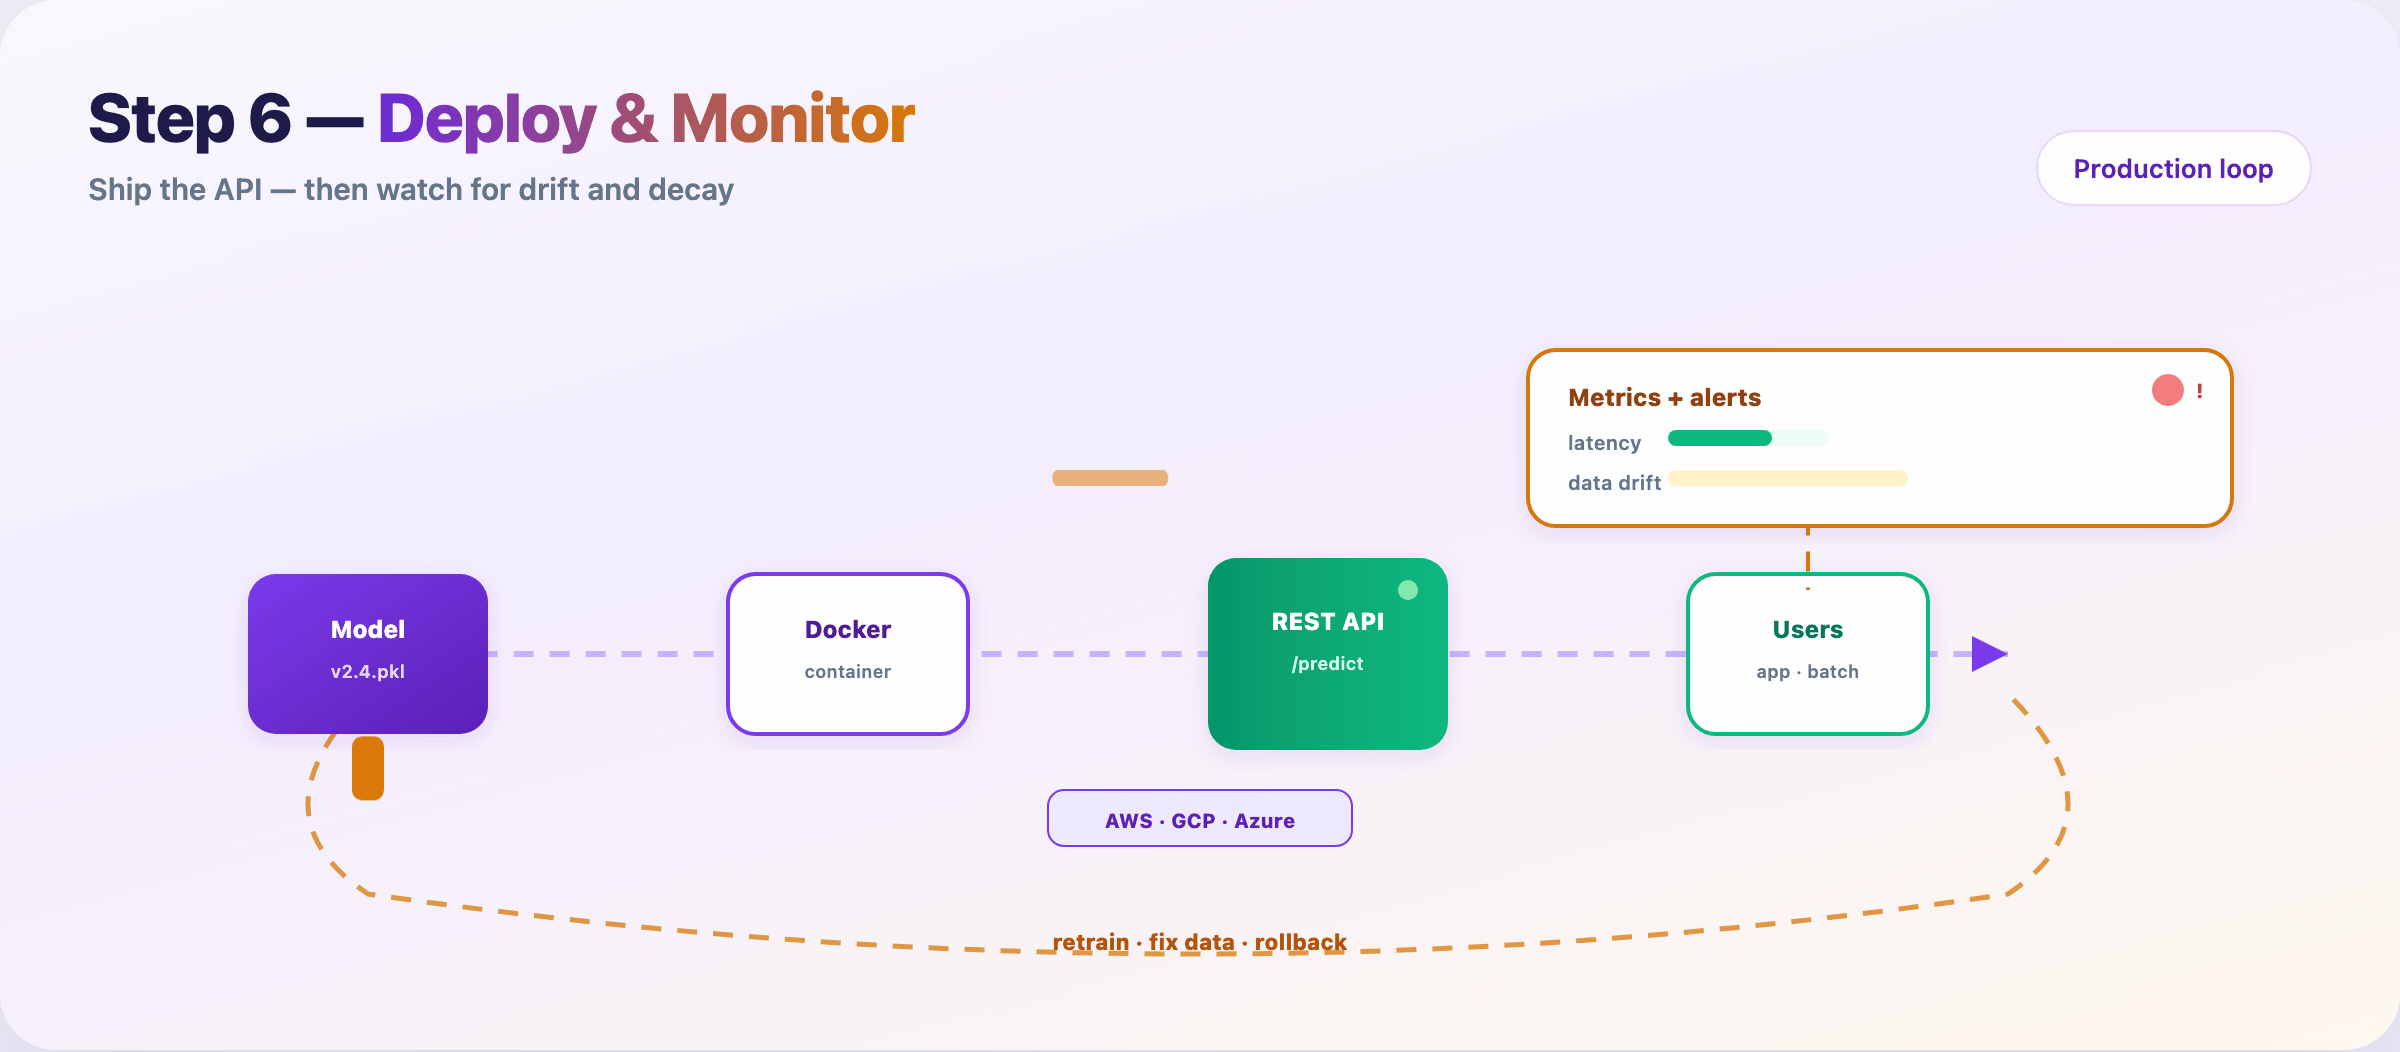
Models rot. User behavior shifts. Upstream schemas change. Monitoring is not optional — it’s Step 10 of the same pipeline.
The ten steps at a glance
| # | Step | Macro stage | GIF |
|---|---|---|---|
| 1 | Define problem & KPIs | Problem | GIF 2 |
| 2 | Feasibility check | Problem | — |
| 3 | Collect data | Data | GIF 3 |
| 4 | Clean & explore (EDA) | Data | GIF 3 |
| 5 | Feature engineering | Data | GIF 3 |
| 6 | Split & leakage audit | Data | GIF 3 |
| 7 | Choose model | Model | GIF 4 |
| 8 | Train & tune | Train | GIF 5 |
| 9 | Evaluate & test | Evaluate | GIF 6 |
| 10 | Deploy & monitor | Deploy | GIF 7 |
Where the time actually goes
| Phase | Steps | Typical calendar share |
|---|---|---|
| Planning | 1–2 | 5–10% |
| Data | 3–6 | 40–60% |
| Modeling | 7–8 | 15–25% |
| Validation | 9 | 5–10% |
| Production | 10 | 10–20% (ongoing) |
The algorithm (Steps 7–8) is often under a quarter of the work. The rest is clarity, data, engineering, and ops.
FAQ
Should my blog say 6 steps or 10?
Use 10 in the title for depth and SEO (“complete ML pipeline”). Mention the 6 macro stages once in the intro so readers who know MLOps diagrams still feel at home.
Do I need ten GIFs?
No. Seven is enough if Steps 3–6 share the data-prep funnel GIF and Steps 1–2 share the problem-framing GIF.
What’s the single most skipped step?
Step 2 (feasibility) and Step 6 (leakage audit). Skipping them causes the most expensive rework.
When do I stop training?
When validation metrics plateau and the model beats your Step 1 baseline on the metrics that matter for the product.
Publish checklist
- [ ] Hero:
blog-poster-1200x600.png(PNG, not GIF) - [ ] GIF 1 after intro paragraph
- [ ] GIFs 2–7 under matching step sections
- [ ] Meta description: Ten steps to build a machine learning model — from KPIs and data prep to training, evaluation, deployment, and monitoring.
- [ ] LinkedIn: short hook in post; full URL in first comment
Regenerate assets
cd guides/ml-model-6-steps/assets
python3 render_blog_poster.py
python3 render_gif_01.py
python3 render_gif_02.py
python3 render_gif_03.py
python3 render_gif_04.py
python3 render_gif_05_07.py all
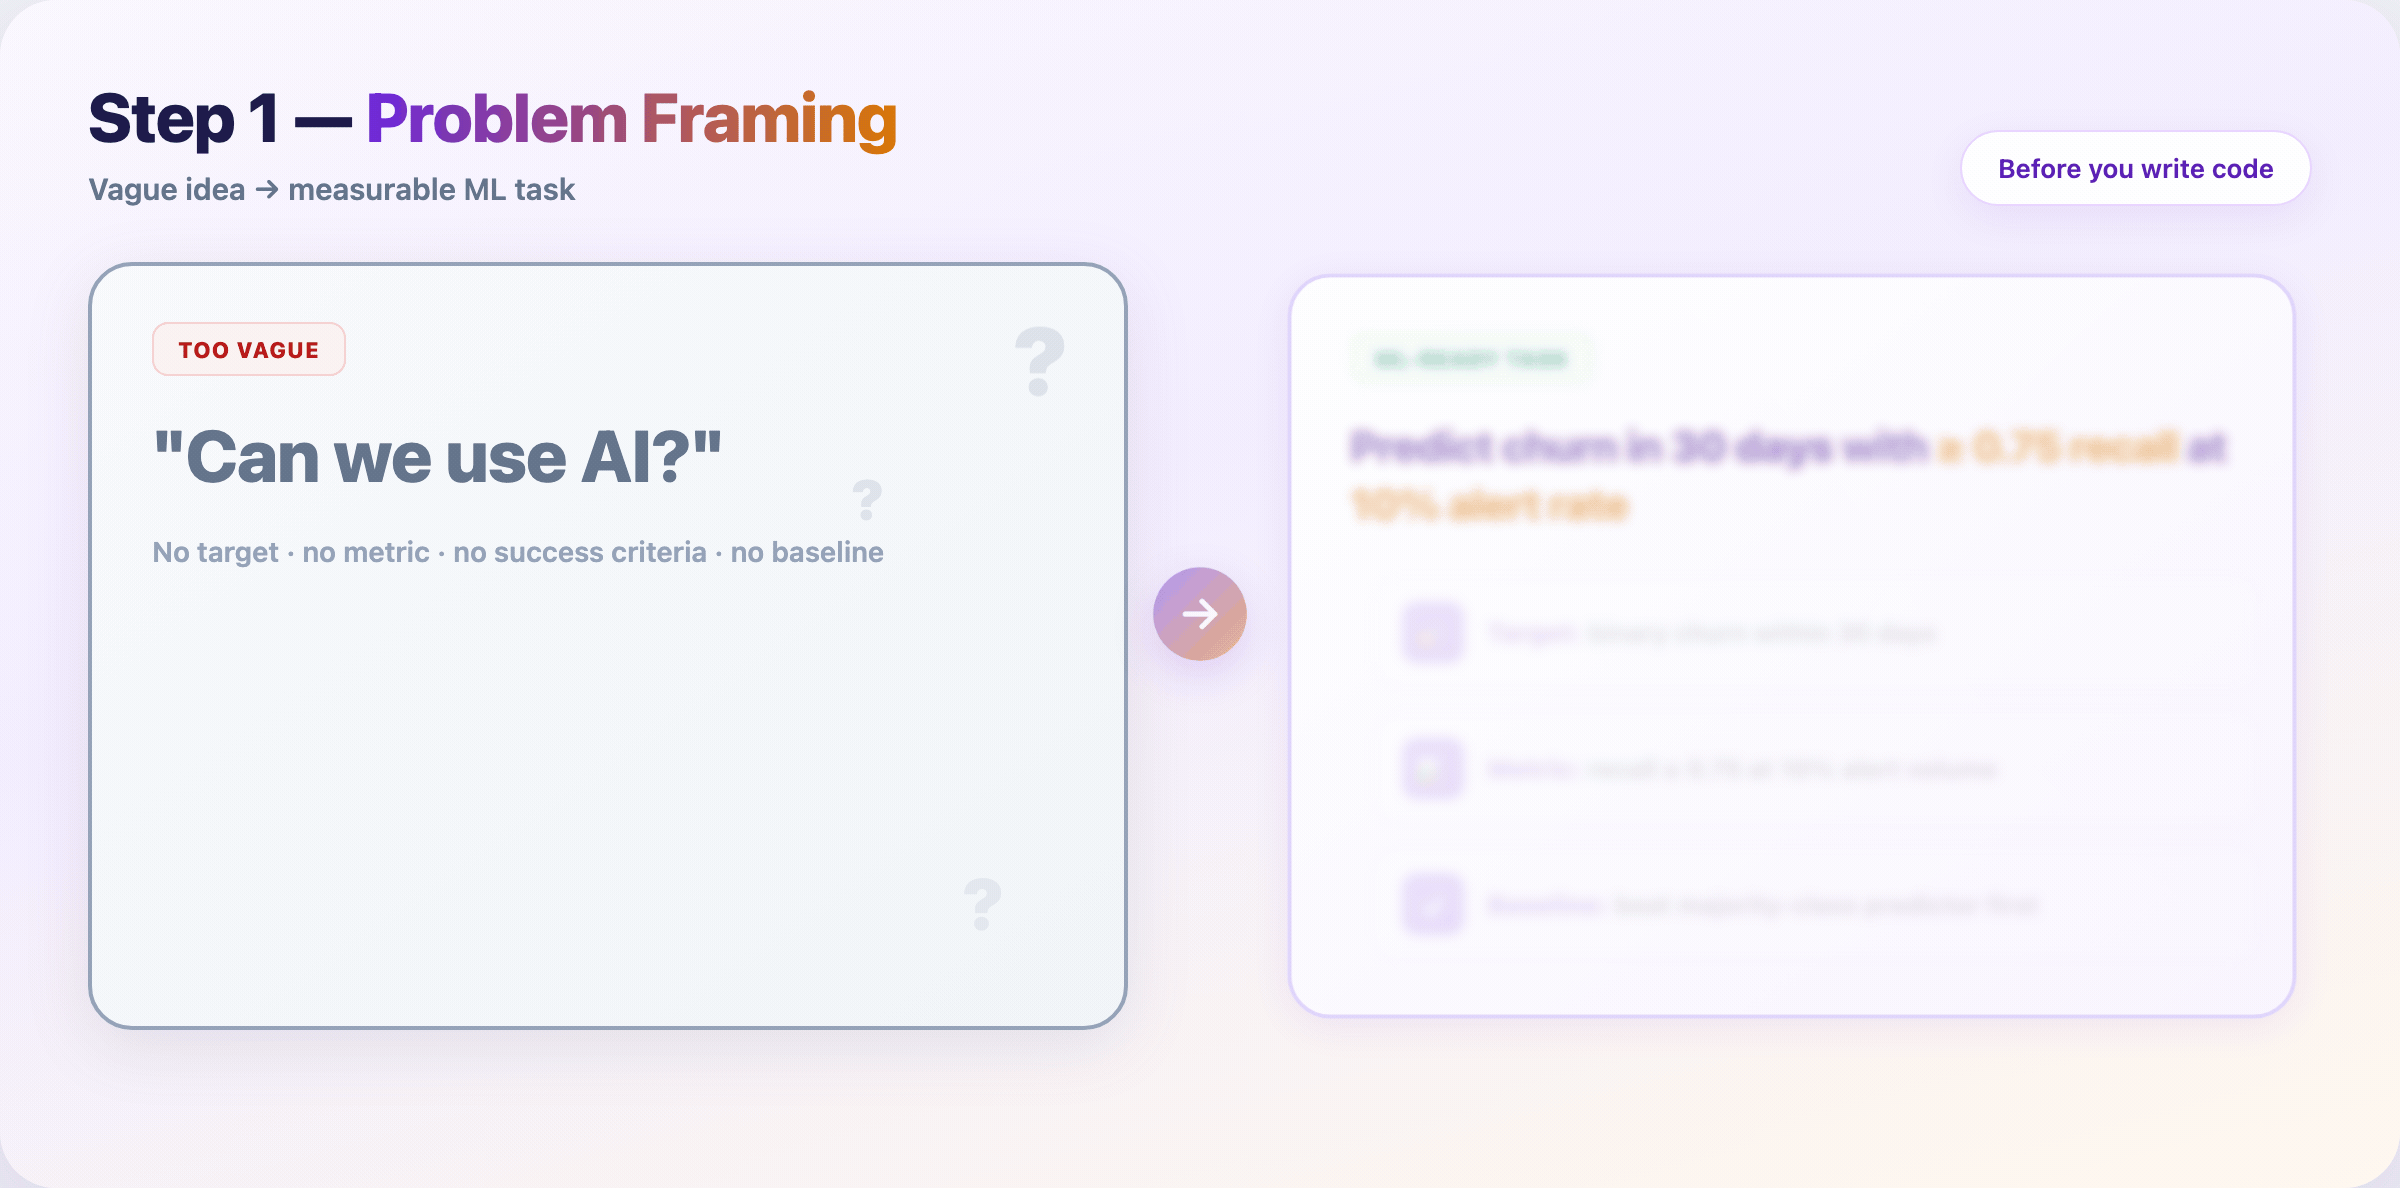
— Define the problem and success metrics
Before notebooks open, write down what “done” looks like.
- What decision should the model support?
- What metric matches the cost of being wrong? (precision vs recall, MAE vs RMSE)
- What baseline must you beat? (rules, majority class, last year’s manual process)
Deliverable: one-page brief — use case, constraints, KPIs, baseline.
Step 2 — Run a feasibility check
Not every idea needs machine learning.
Ask plainly:
- Do you have labeled examples (or a realistic labeling plan)?
- Is the signal in the data, or is this a product/process fix?
- Can you get to a MVP metric in the time you have?
If the answer is no, fix data collection or product scope first. Cheaper than training the wrong model.
Deliverable: go / no-go note with risks listed.
Step 3 — Collect raw data
Gather examples that match the problem you defined in Step 1.
- Pull from warehouses, APIs, logs, human labelers, or public datasets
- Track provenance — source, timestamp, version, PII rules
- Store raw data immutable; never overwrite the source copy
Common mistake: training on a convenience sample that doesn’t match production traffic.
Step 4 — Clean and explore (EDA)
Open the data before you trust it.
- Profile distributions, missing rates, duplicates, unit bugs
- Plot labels over time — sudden shifts often mean pipeline breaks
- Document findings; EDA notes become onboarding material later
Time spent here: often 20–40% of the project calendar. That’s normal.
Step 5 — Engineer features
Turn raw columns into signals the model can learn from.
- Ratios, aggregates, encodings, text tokens, date parts, embeddings
- Keep feature definitions in code (not one-off notebook cells)
- Version feature logic with the same discipline as model weights
Rule: if you can’t explain a feature to a teammate, don’t ship it.
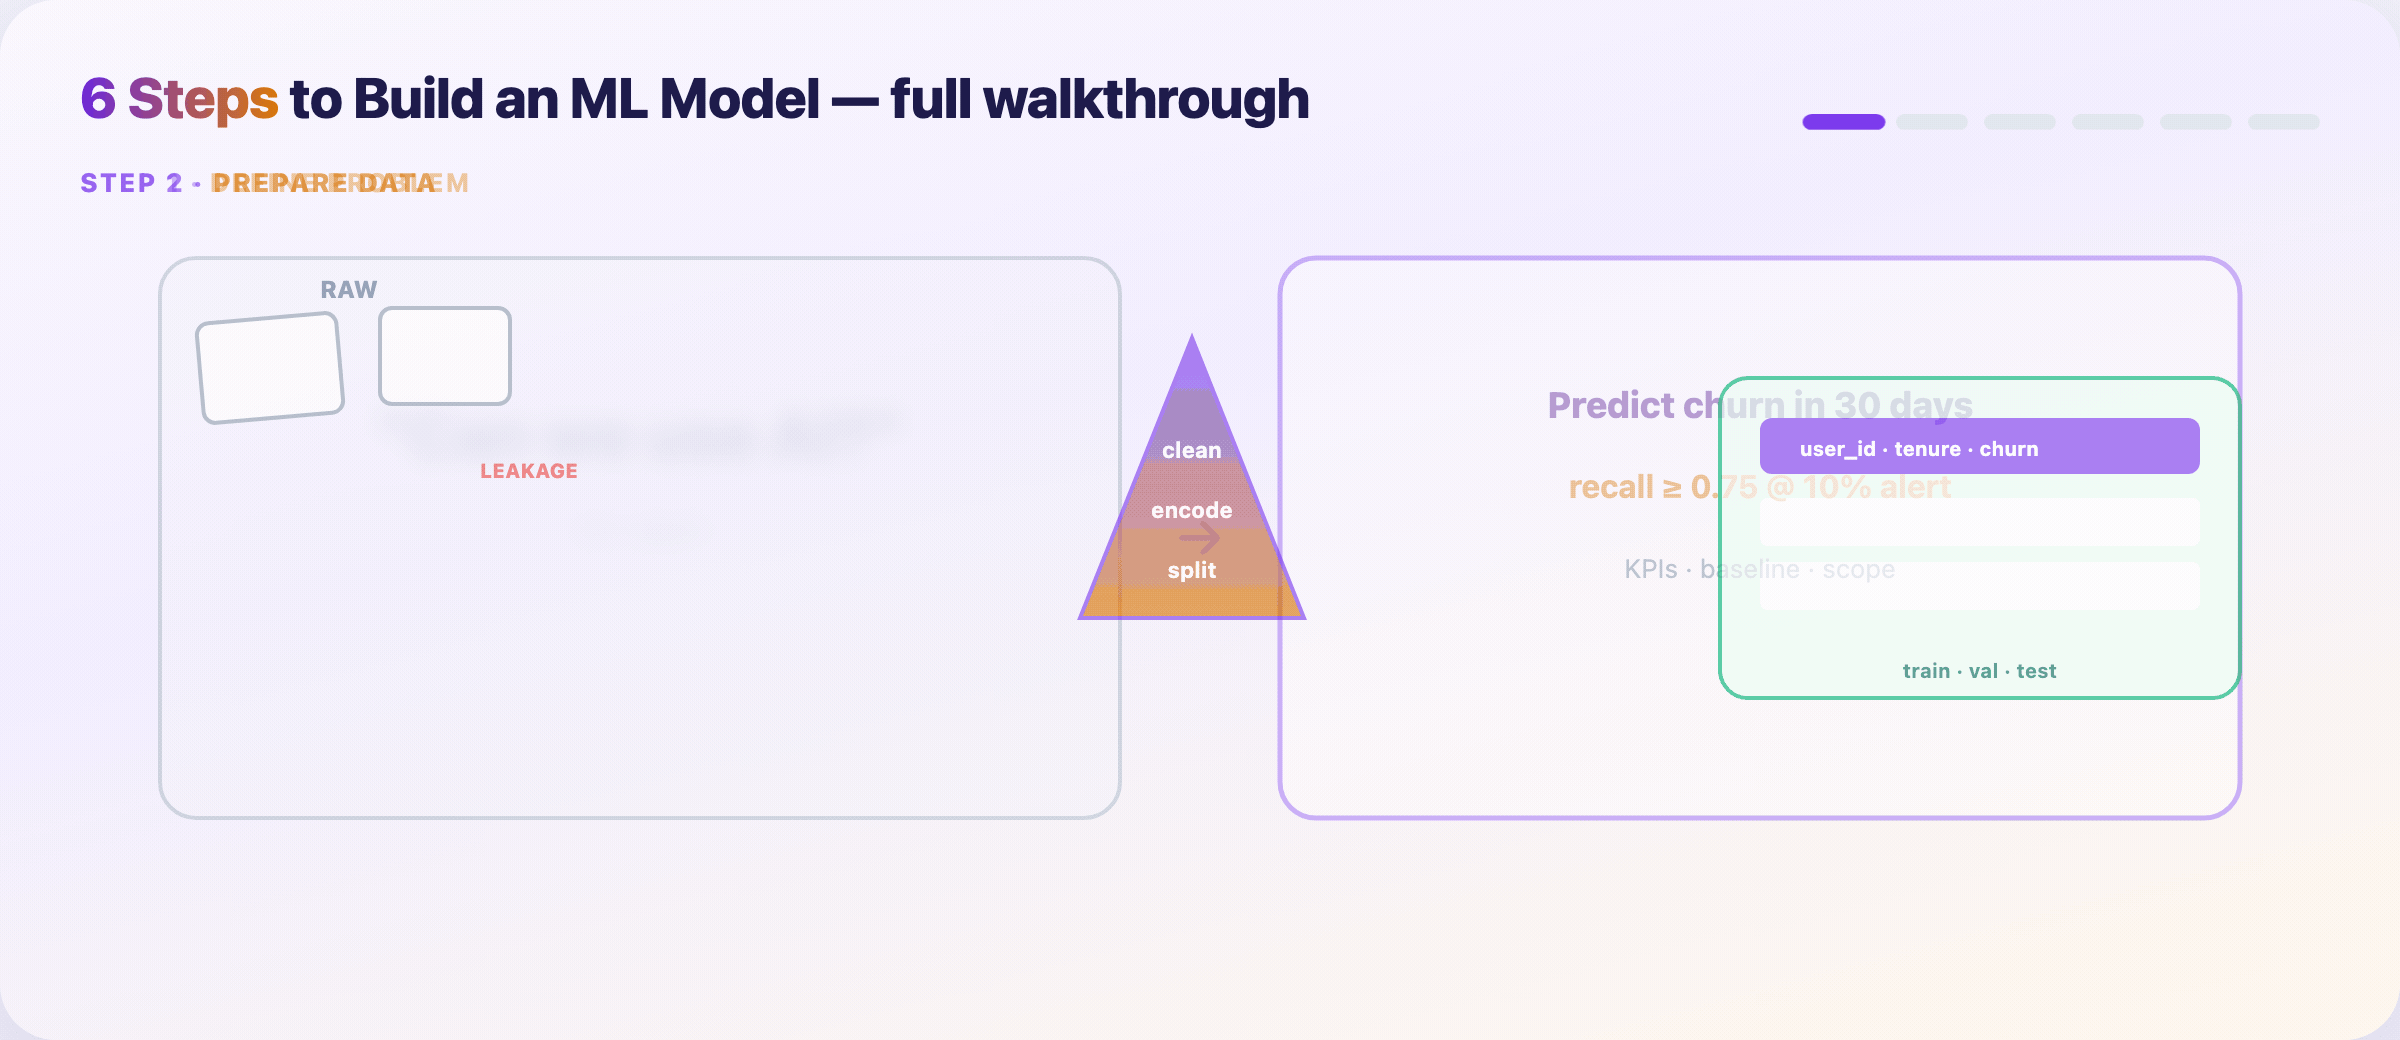
Step 6 — Split data and kill leakage
Lock your evaluation story before training hype starts.
- Train / validation / test — test set stays sealed until the end
- Time-based splits for forecasting; group splits when rows aren’t independent
- Reject columns that encode the future (
future_spend, post-outcome fields)
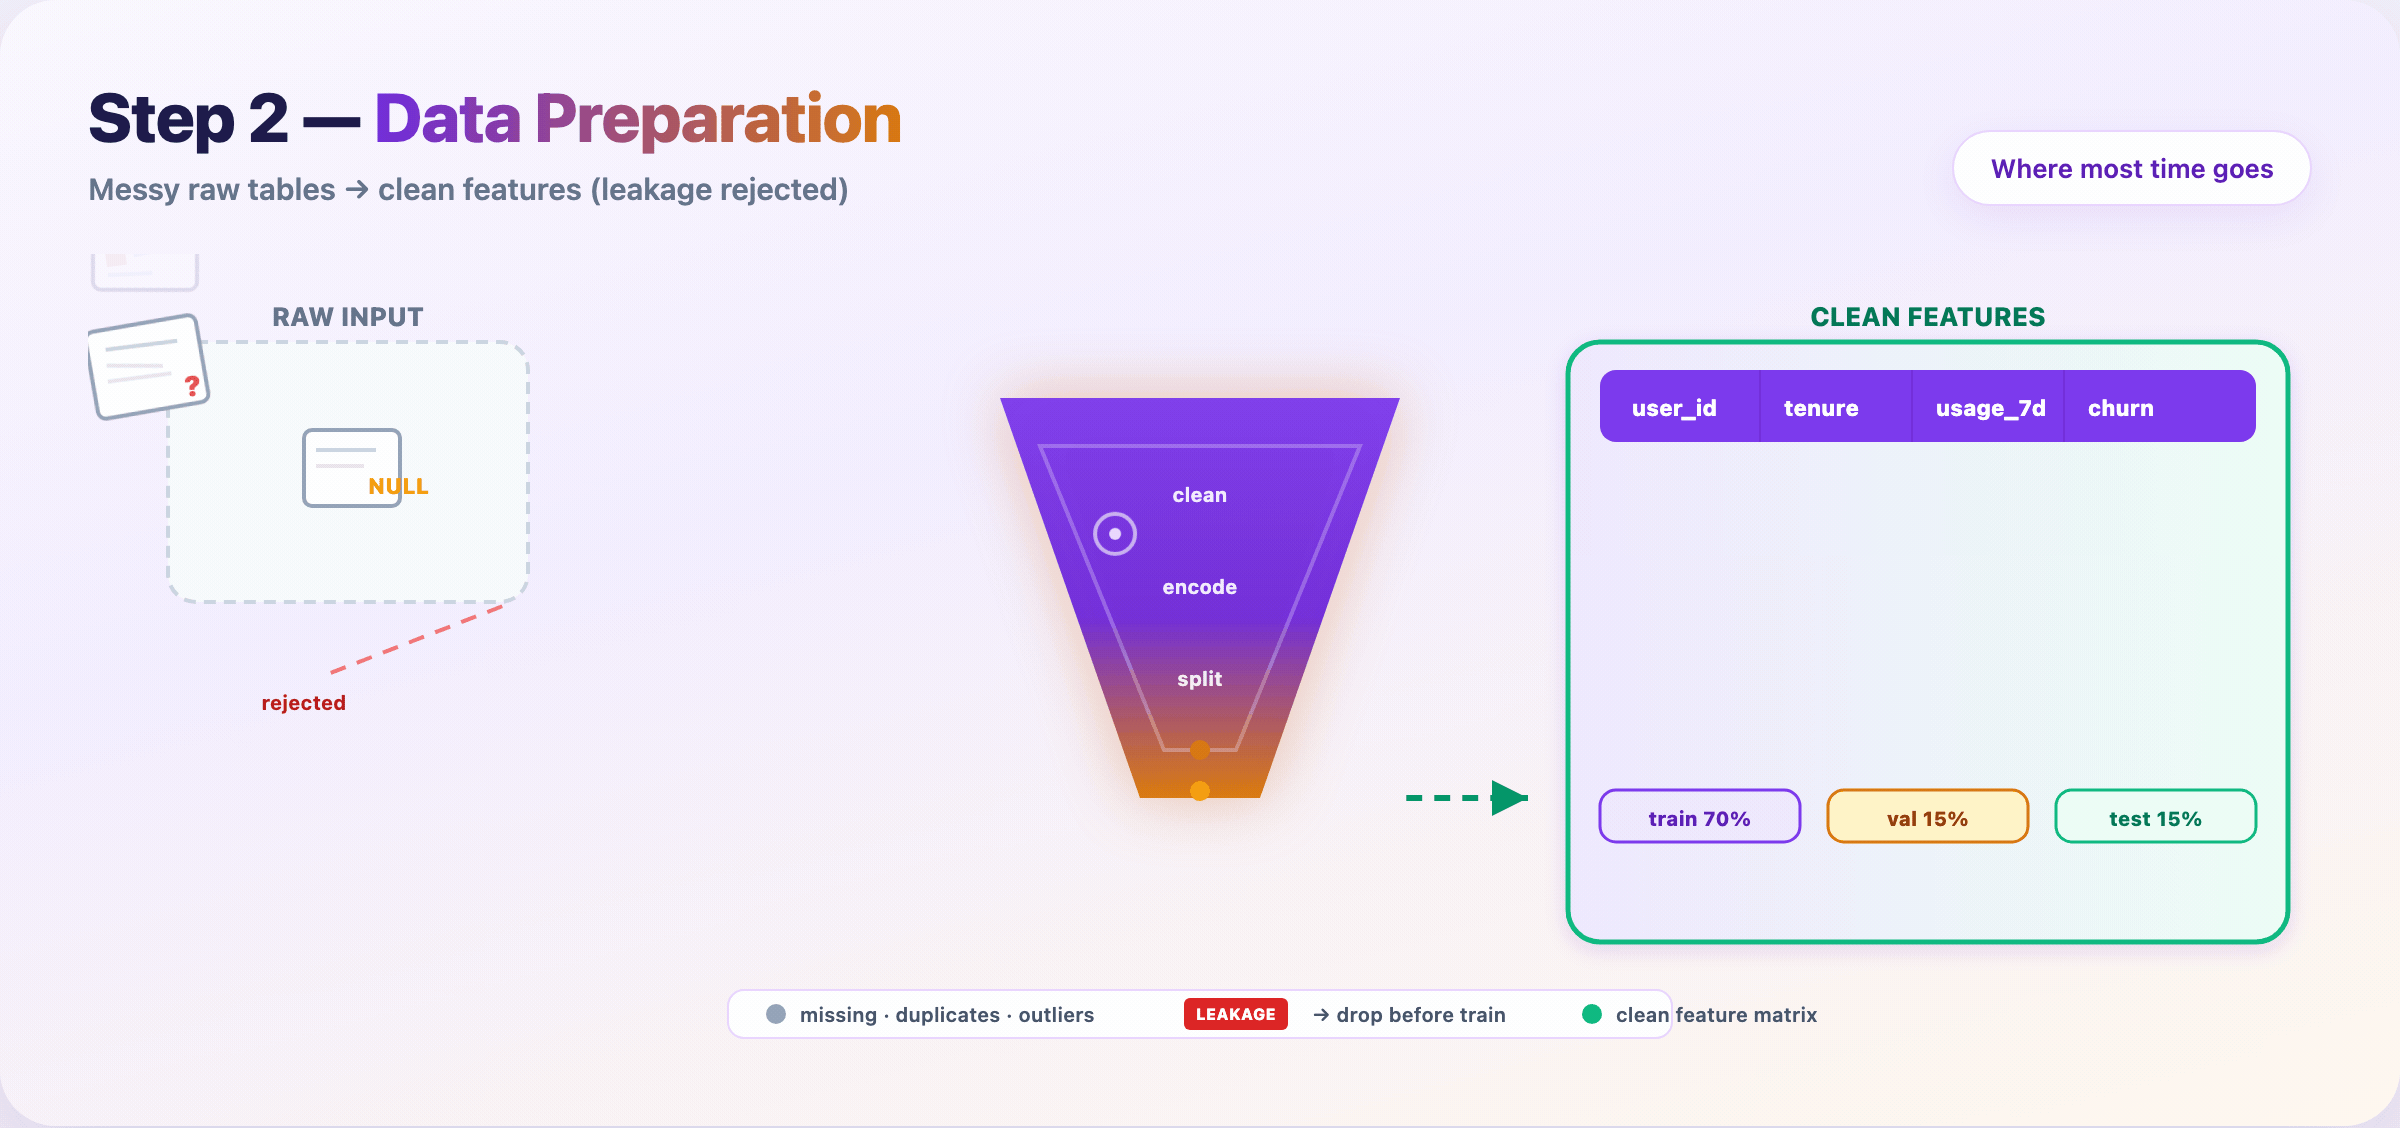
Deliverable: feature matrix + split indices + leakage audit checklist.
Step 7 — Choose a modeling approach
Match method to data size and interpretability — not Twitter hype.
| Data | Need explanations? | Often start with |
|---|---|---|
| Small | Yes | Logistic regression, linear models |
| Large | Yes | Random Forest, GBT + SHAP |
| Small | No | Gradient boosting (XGBoost/LightGBM) |
| Large | No | Neural networks |
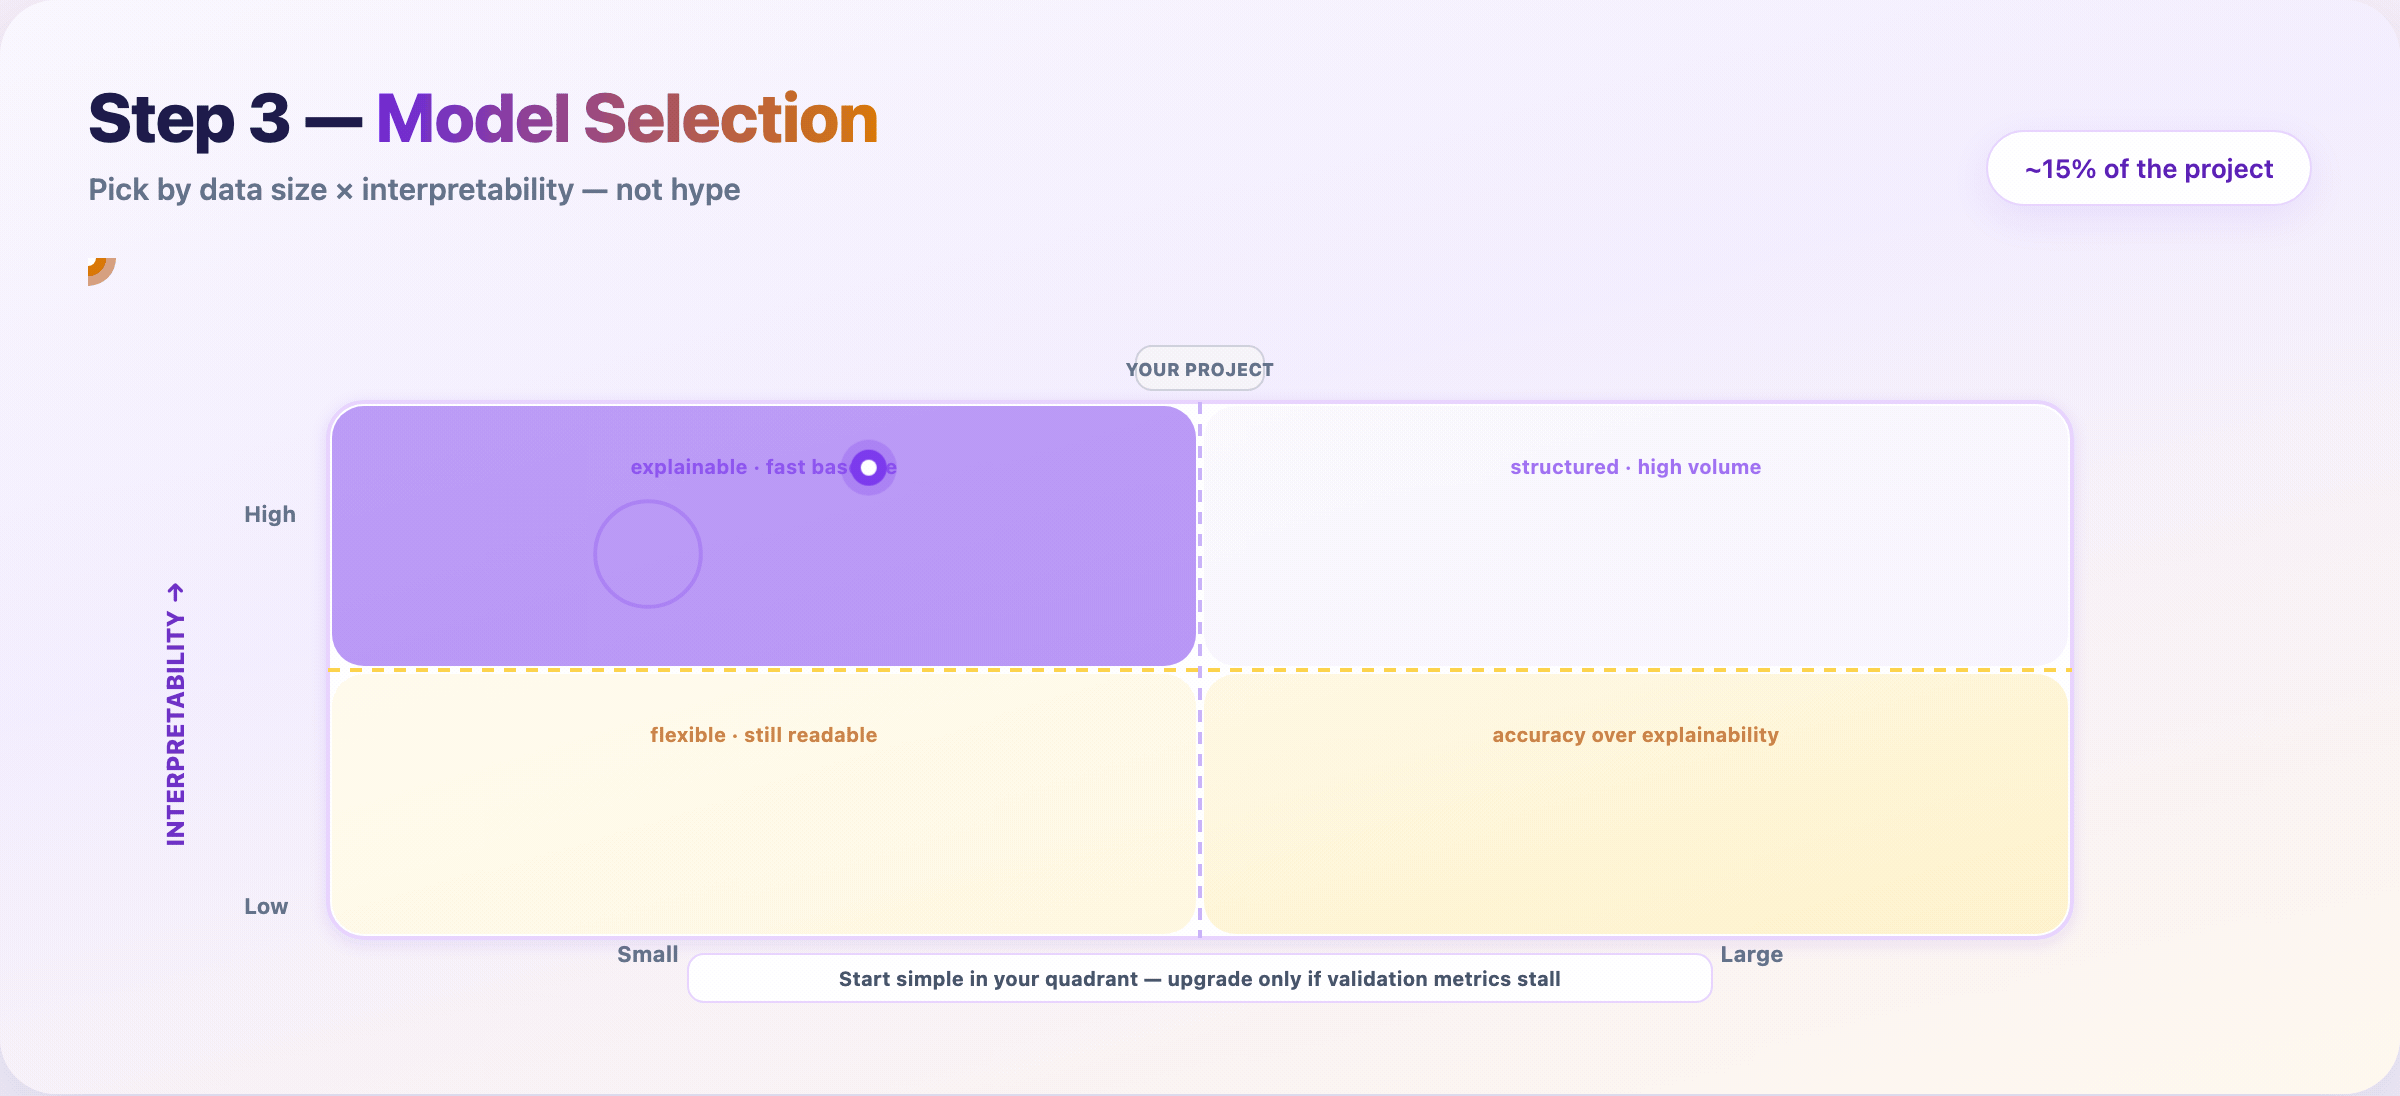
Train the simplest candidate that could work. Upgrade only when validation metrics justify the complexity.
Step 8 — Train and tune
Feed prepared data to the model. Iterate until validation performance plateaus.
Loop:
- Train on the training set
- Measure on the validation set
- Adjust hyperparameters or features
- Repeat
Log every run: data hash, config, metrics, runtime. Reproducibility saves you during audits and regressions.
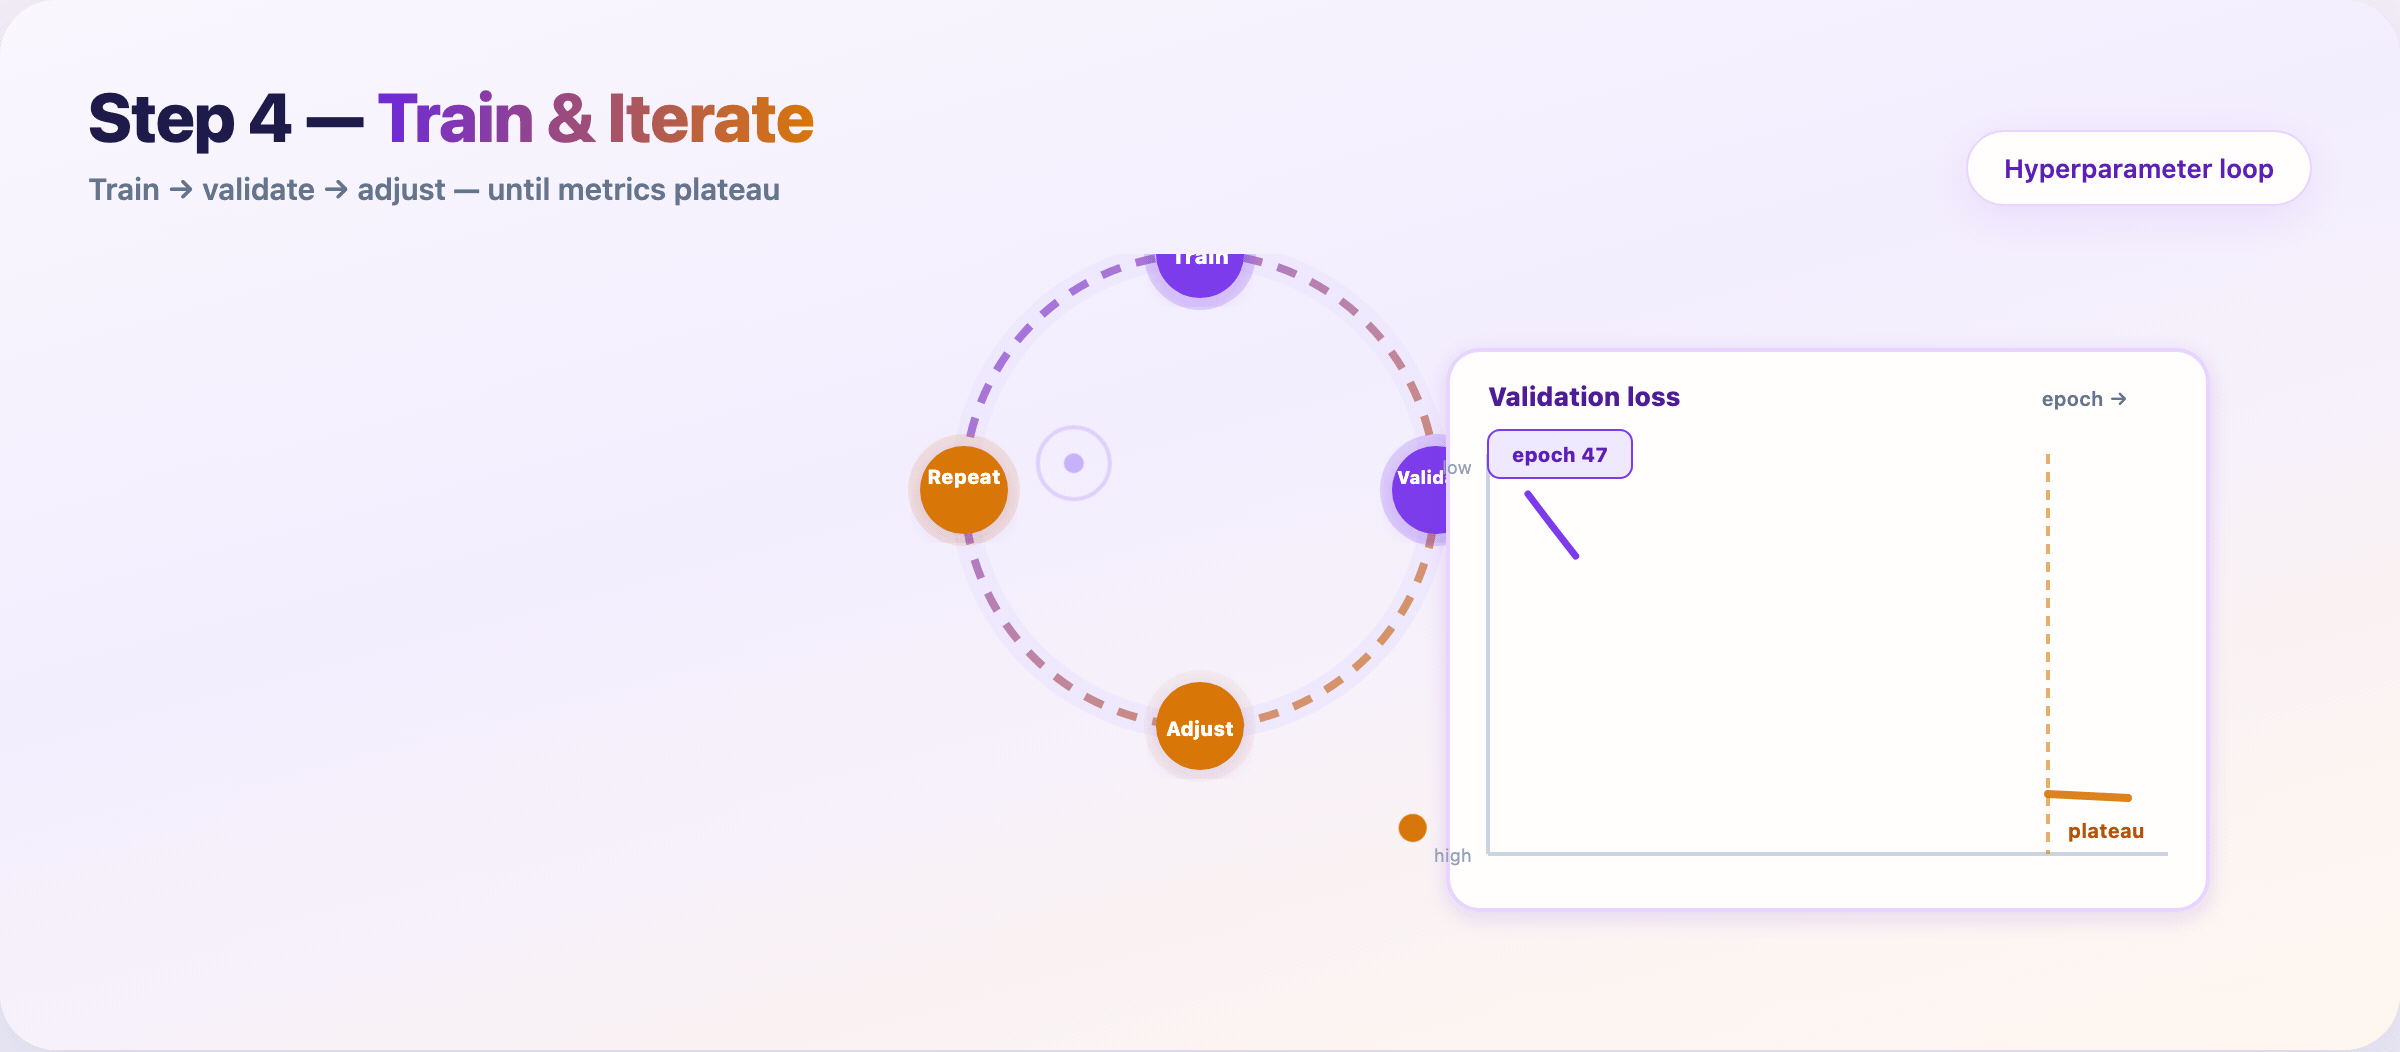
Stop when: validation metric gains shrink below your noise floor — not when the leaderboard looks pretty.
Step 9 — Evaluate on the held-out test set
The test set gets one shot. No peeking during tuning.
- Report metrics that match Step 1 KPIs
- Slice by region, device, cohort, language — aggregates hide failures
- Check fairness across groups; error clusters point back to Steps 4–6
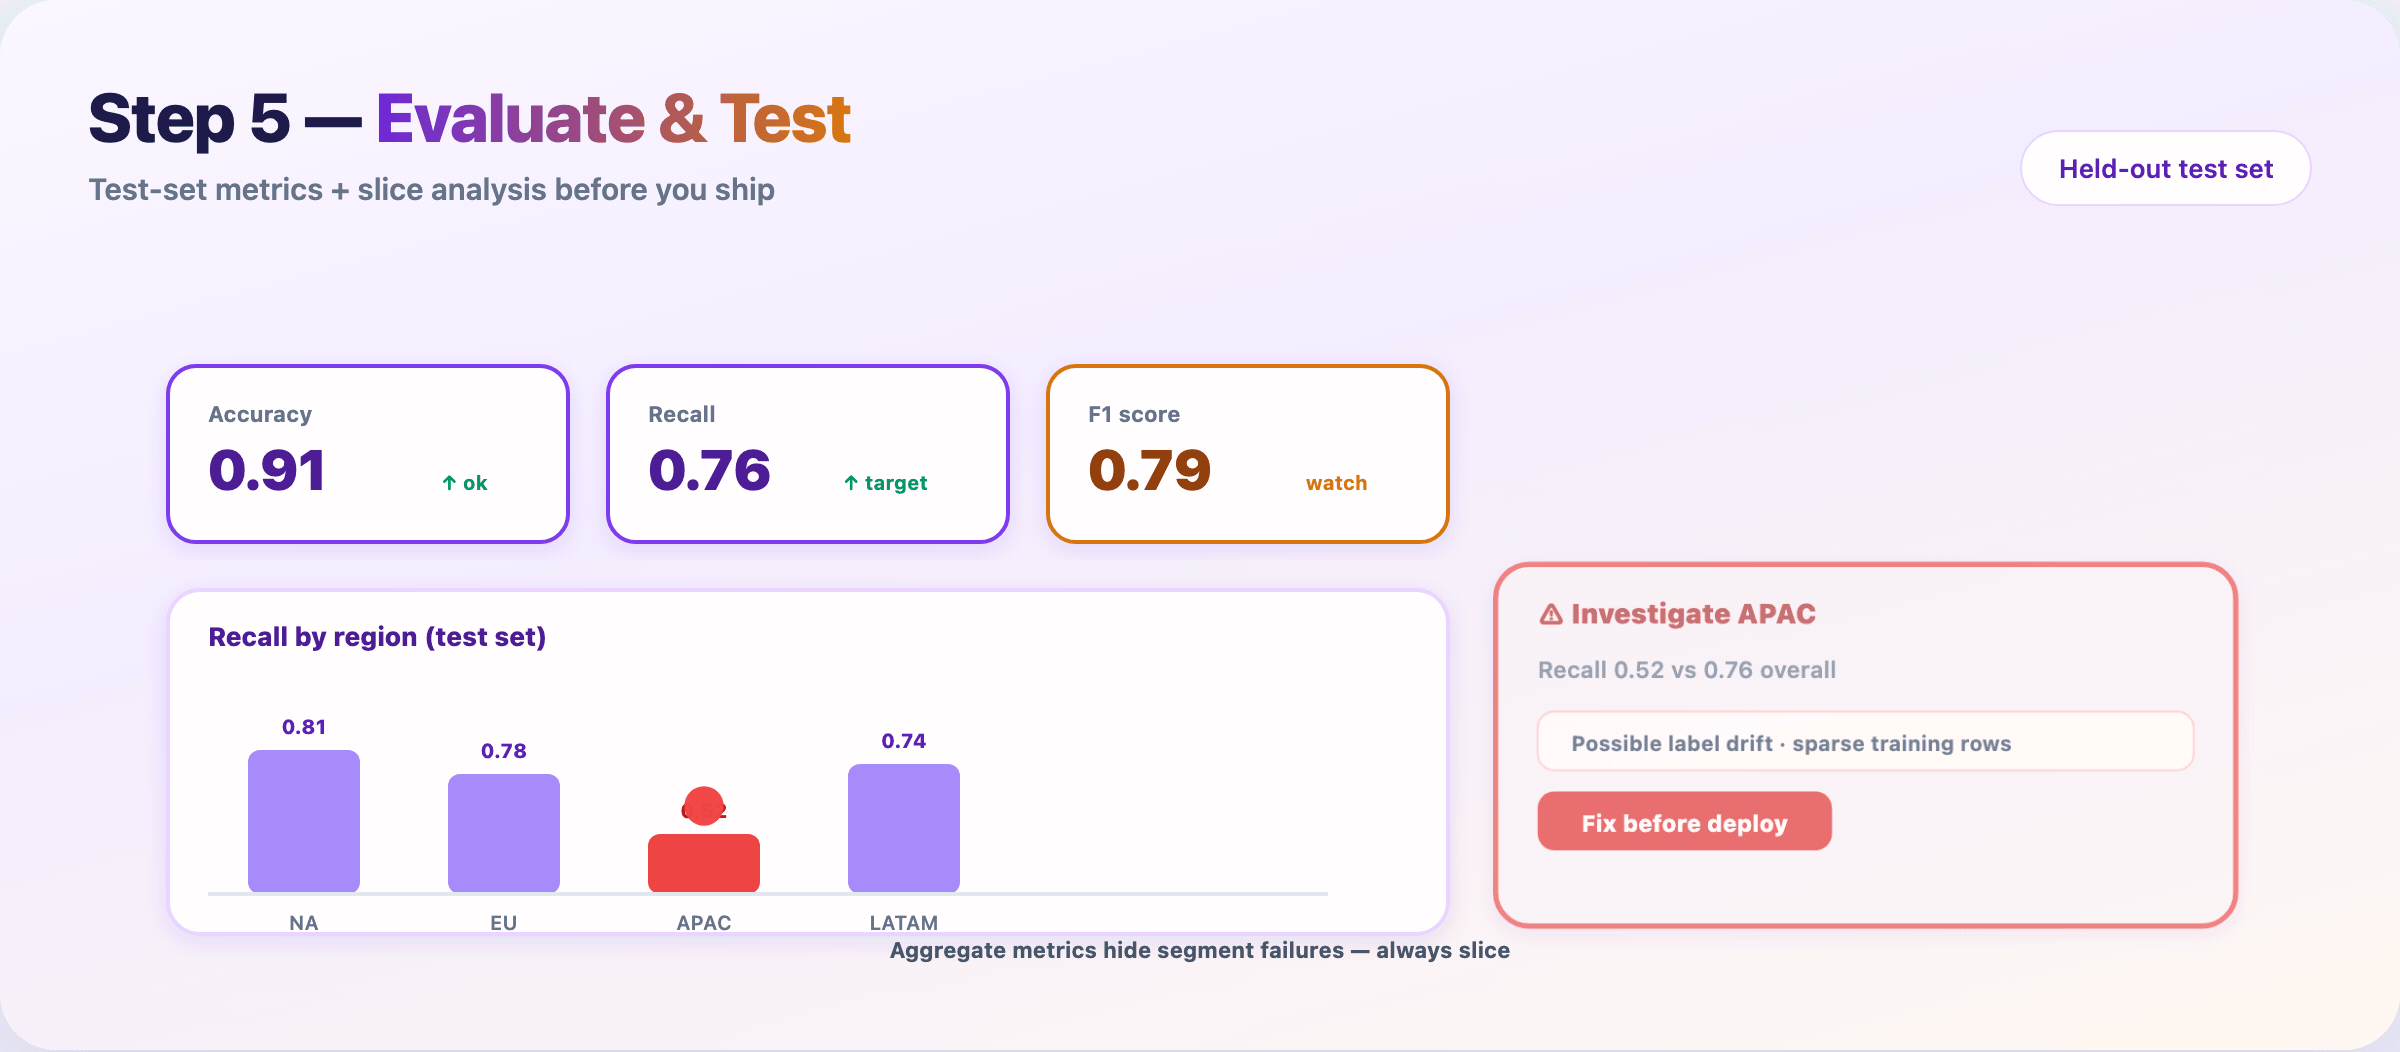
If a slice fails, don’t deploy and hope. Fix data or modeling, then re-run from Step 8.
Step 10 — Deploy, monitor, and retrain
Package the model, ship an API, watch it in the wild.
Typical path:
- Serialize artifact (
v2.4.pkl, ONNX, SavedModel) - Containerize (Docker)
- Deploy behind
/predicton cloud or edge - Monitor latency, errors, input drift, prediction drift
- Retrain or rollback when alerts fire
Models rot. User behavior shifts. Upstream schemas change. Monitoring is not optional — it’s Step 10 of the same pipeline.
The ten steps at a glance
| # | Step | Macro stage | GIF |
|---|---|---|---|
| 1 | Define problem & KPIs | Problem | GIF 2 |
| 2 | Feasibility check | Problem | — |
| 3 | Collect data | Data | GIF 3 |
| 4 | Clean & explore (EDA) | Data | GIF 3 |
| 5 | Feature engineering | Data | GIF 3 |
| 6 | Split & leakage audit | Data | GIF 3 |
| 7 | Choose model | Model | GIF 4 |
| 8 | Train & tune | Train | GIF 5 |
| 9 | Evaluate & test | Evaluate | GIF 6 |
| 10 | Deploy & monitor | Deploy | GIF 7 |
Where the time actually goes
| Phase | Steps | Typical calendar share |
|---|---|---|
| Planning | 1–2 | 5–10% |
| Data | 3–6 | 40–60% |
| Modeling | 7–8 | 15–25% |
| Validation | 9 | 5–10% |
| Production | 10 | 10–20% (ongoing) |
The algorithm (Steps 7–8) is often under a quarter of the work. The rest is clarity, data, engineering, and ops.
FAQ
Should my blog say 6 steps or 10?
Use 10 in the title for depth and SEO (“complete ML pipeline”). Mention the 6 macro stages once in the intro so readers who know MLOps diagrams still feel at home.
Do I need ten GIFs?
No. Seven is enough if Steps 3–6 share the data-prep funnel GIF and Steps 1–2 share the problem-framing GIF.
What’s the single most skipped step?
Step 2 (feasibility) and Step 6 (leakage audit). Skipping them causes the most expensive rework.
When do I stop training?
When validation metrics plateau and the model beats your Step 1 baseline on the metrics that matter for the product.
Publish checklist
- [ ] Hero:
blog-poster-1200x600.png(PNG, not GIF) - [ ] GIF 1 after intro paragraph
- [ ] GIFs 2–7 under matching step sections
- [ ] Meta description: Ten steps to build a machine learning model — from KPIs and data prep to training, evaluation, deployment, and monitoring.
- [ ] LinkedIn: short hook in post; full URL in first comment